Prone Position: Definition, Benefits, and Process Explained
What is Prone Position?
Prone positioning has gained a lot of popularity over past years, mainly owing to its ability to enhance oxygenation in the acute respiratory distress syndrome patients, which leads to a decrease in mortality. Various studies and experiments have been conducted that suggest its efficacy to achieve the above-mentioned objectives (1, 2).
The prone position was introduced in 1974 by Bryan as a measure to help with the better expansion of the dorsal region of the lungs and resultant improvement in the oxygenation of the anesthetized and paralytic patients. (3)
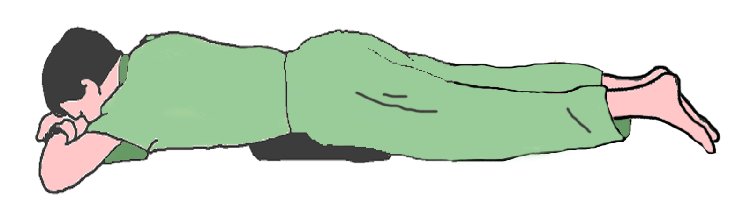
The prone position is basically achieved when the person is laid straight on the stomach, that is, the chest or the ventral side is downwards while the back or the dorsal side is upwards.
Procedure:
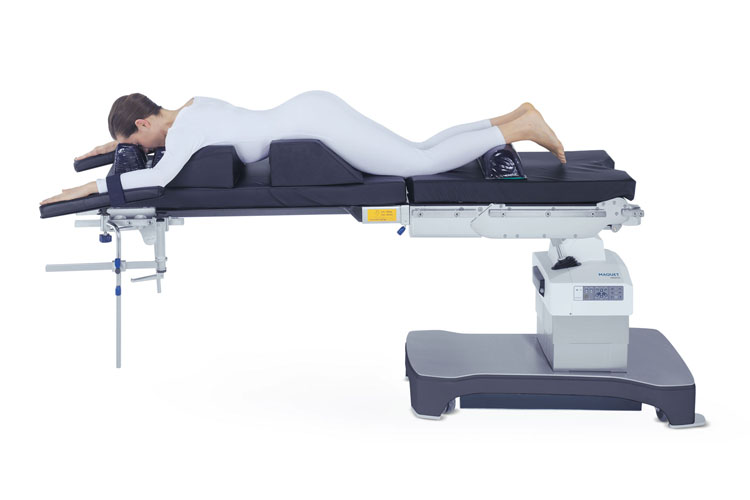
Helping a patient through the process of attaining the prone position will require four people who are well-versed with the technique. While the first one will stand close to the head and will take care of the endotracheal tube, the second one will be responsible for taking care of various connections to the body, such as the catheter, drains, etc. The other two will stand one at each side of the bed, that is, the left and the right. Their job will be to turn the patient in the required direction. The first person should also be prepared to help with the removal of excess secretion, which is produced as a result of the prone position.
The patient is turned such that he/she attains lateral decubitus position as the initial stage. In this position, the person lies on the left side. Place both the hands of the patient along the respective sides. Turn the patient along one side and connect the electrodes for cardiac monitoring at the back. In case the process does not serve its purpose, you can also use abdominal suspension.
The people administering the technique should ensure that the endotracheal tube is fixed 2 cm above the Carina in order to reduce the chances of complications. Also, they must ensure that there no presence of foreign particle, which might obstruct the process of eternal feeding. The position of the head of the patient should be changed every 2 to 4 hours in order to avoid discomfort.
Advantages of Prone Position
Besides the improvement in oxygenation, the prone position offers many other advantages to the patient. It improves the functional residual capacity of the lungs, thereby, reducing the chances of abdomen expansion during the position. It reduces the chances of lung collapse due to internal factors and enables them to inflate even at low pressures. It also enhances the alveolar ventilation and makes it more consistent in nature. In this position, the heart basically relies on the right lung instead of the left one, thus, reducing the compression rate on the lungs. This position also decreases the posterior atelectatic lung, which tends to make the lungs more compliant in addition to enhancing the ventilation-perfusion matching. The prone position does not have any negative impact on the respiratory mechanics, instead, improves it.
Potential Sources of Injury in Prone Position
- Patient must be first examined for his/her ability to bear the prone position.
- The staff must ensure not to apply too much pressure, especially on the delicate and small parts of the body such eyes, ears, nose, etc. Excess pressure may lead to damage of the body part. This pressure may not only be applied through the hands, it may also be a result of the obstruction caused by the arterial supply or venous drainage.
- The dependent areas such as nose, forehead, breast, arms, chest, genitalia, and pelvis must be properly noted and addressed. In case of joint replacement, any negligence may lead to tissue injuries or dislocation.
- Direct pressure may lead to damage of the nerves. It should be taken care that nerves are applied with appropriate pressure only.
- Ocular damage might be a result of two factors. The first one might be excess pressure on the eyes, while the second one being poor perfusion. This may lead to severe damages, hence, it should be well taken care of.
- Too much pressure can be transferred from the lower and upper limbs to the head, neck, chest, abdomen, and vessels. This may cause the corresponding areas to swell, thus, producing obstructions to the air flow.
Prone Positioning Checklist
A checklist ensures that the complications associated with prone positioning can be avoided. It includes following steps (4):
- Identify the team members and make sure that everyone has been assigned their task in order to avoid confusion during the process.
- Identify the connections to the patient’s body and make sure they do not face any blockage.
- Make sure you provide cushions wherever necessary. It not only ensures the patient’s comfort, but also reduces the chances of extra pressure on the smaller parts of the body.
- All the test that should have be conducted prior to the commencement of prone positioning should be performed by the nursing staff, and same should be checked by the higher authorities involved.
- The team must ensure coordination between the team members.
Duration of Prone Positioning
Ideally, there is no specific duration for which the person should be under prone position. There have been cases in which the conditions have seen improvement once the patient is in prone condition, but once repositioned to supine position, the condition deteriorated again. Therefore, it is advisable that the person should be allowed to stay in prone position until the condition has completely stabilized.
Further Resources: